Launching Your Twitch Stream
If you have ever wondered how to stream on Twitch, you are in the right place. Twitch is one of the most popular live streaming platforms, with millions of creators broadcasting content daily. Whether you want to stream video games, host talk shows, or engage in creative content, learning how to set up and optimize your Twitch stream is essential. In this guide, you will discover the best Twitch streaming setup, software, and strategies to enhance your live streaming experience.
What You Need to Start Streaming on Twitch
Before you go live, it is important to have the right equipment and software. Here is what you will need:
- A reliable computer with decent specs
- A high-quality microphone for clear audio
- A webcam for a more engaging stream
- A stable internet connection with at least 5 Mbps upload speed
- Streaming software like OBS Studio or Streamlabs
- A Twitch account with Two-Factor Authentication enabled
A Reliable Computer with Decent Specs
Your computer is the foundation of your streaming setup. It must be capable of handling both your gameplay and the streaming software simultaneously. If your computer does not meet the minimum specifications, your stream may lag or crash.
Recommended PC Specs for Streaming:
- Processor: Intel i5 (10th gen or later) or AMD Ryzen 5 (or higher)
- RAM: At least 16GB for smooth multitasking
- Graphics Card: NVIDIA RTX 3060 / AMD RX 6600 or better for high-quality gameplay
- Storage: SSD (Solid State Drive) to reduce loading times and improve performance
For streaming in 1080p at 60fps, a higher-end CPU and GPU are recommended to ensure smooth encoding and video quality.
A High-Quality Microphone for Clear Audio
Clear and professional audio quality is essential for a successful Twitch stream. While many beginner streamers start with a headset microphone, upgrading to a dedicated microphone greatly improves audio clarity.
Best Microphones for Streaming:
- USB Microphones: Blue Yeti, HyperX QuadCast, Elgato Wave 3
- XLR Microphones (for advanced users): Shure SM7B, Audio-Technica AT2020 with an audio interface (Focusrite Scarlett 2i2)
If you choose an external microphone, consider using a pop filter and boom arm to reduce background noise and improve sound quality.
A Webcam for a More Engaging Stream
Adding a webcam to your Twitch stream enhances viewer engagement. Seeing a streamer’s reactions and expressions makes the experience more personal and interactive.
Recommended Webcams for Streaming:
- Budget Option: Logitech C920 (1080p at 30fps)
- Mid-Range: Razer Kiyo (built-in ring light)
- Professional: Sony Alpha a6000 or Canon EOS M50 (requires a capture card like Elgato Cam Link 4K)
If you are streaming from a console (PlayStation or Xbox), investing in a high-quality webcam with a wide field of view will enhance the visual appeal of your stream.
A Stable Internet Connection with at Least 5 Mbps Upload Speed
A strong and stable internet connection is vital for smooth streaming. If your internet speed is too slow, viewers may experience lag, buffering, or pixelated video quality.
Recommended Internet Speeds for Twitch Streaming:
- 720p at 30fps: Minimum 3 Mbps upload speed
- 1080p at 60fps: Minimum 6 Mbps upload speed
- 4K Streaming: Requires at least 15 Mbps upload speed
To ensure stability, use a wired Ethernet connection instead of Wi-Fi to minimize packet loss and disconnections.
Streaming Software Like OBS Studio or Streamlabs
Streaming software is necessary to capture and broadcast your video and audio to Twitch. There are multiple options available, each with unique features:
Best Streaming Software for Twitch:
- OBS Studio: Free and open-source software with extensive customization options.
- Streamlabs OBS: A more user-friendly version of OBS with built-in overlays and alerts.
- XSplit: A premium streaming solution with additional professional features.
OBS Studio is widely recommended due to its flexibility and support for plugins, while Streamlabs is ideal for beginners who want built-in themes and widgets.
A Twitch Account with Two-Factor Authentication Enabled
To begin streaming, you need an active Twitch account. Visit Twitch.tv, sign up, and enable Two-Factor Authentication (2FA) to enhance account security.
Steps to Enable 2FA on Twitch:
- Log in to your Twitch account.
- Go to Settings > Security and Privacy.
- Click Enable Two-Factor Authentication.
- Follow the instructions to link your phone number or authentication app.
Once enabled, you can retrieve your Stream Key from the Twitch Creator Dashboard and enter it into your streaming software to connect your account.
Having the right streaming setup ensures a professional and enjoyable experience for both you and your viewers. Once your hardware and software are ready, you can start configuring your Twitch stream settings and customizing your channel.
Setting Up Your Twitch Account
To start streaming on Twitch, follow these steps:
- Create an account on Twitch.tv and complete your profile.
- Enable Two-Factor Authentication (2FA) for security.
- Customize your Twitch channel by adding a profile picture, banner, and bio.
- Get your stream key from the Twitch dashboard and connect it to your broadcasting software.
Creating Your Twitch Account
Visit Twitch.tv and click Sign Up. Choose a username, set a strong password, and provide a valid email address. Once your account is created, verify your email to unlock full access to Twitch features.
Customizing Your Twitch Profile
Your Twitch channel is your personal brand. Customize it to attract viewers:
- Profile Picture & Banner: Use eye-catching visuals that represent your style.
- Bio & Panels: Write an engaging bio and add panels for additional info like social media links and donation options.
- Offline Screen: Set a custom offline screen so your channel looks professional even when you are not live.
Retrieving Your Stream Key
Your stream key is a unique identifier that allows broadcasting software to connect to Twitch. To find it:
- Go to your Twitch Creator Dashboard.
- Navigate to Settings > Stream.
- Copy your Primary Stream Key and paste it into your streaming software.
Keeping your stream key private is essential for security. Never share it with anyone.
Once you have completed these steps, your Twitch account will be fully set up, and you will be ready to go live!
Choosing the Best Streaming Software
The right streaming software is essential for broadcasting high-quality content. Here are some of the most popular options:
OBS Studio
- Free and open-source software
- Works with Windows, macOS, and Linux
- Provides advanced customization options
OBS Studio is a powerful and flexible streaming tool used by beginners and professionals alike. It offers advanced features like scene transitions, multiple audio tracks, and custom overlays. Its open-source nature allows developers to create plugins that extend its functionality. OBS Studio is perfect for those who want full control over their stream setup.
Streamlabs
- User-friendly interface with built-in overlays and alerts
- Includes integrated chat and donation features
- Best for beginner streamers
Streamlabs is a modified version of OBS designed for ease of use. It includes built-in themes, widgets, and donation alerts that make it ideal for new streamers. Streamlabs also offers cloud-based settings, allowing streamers to access their preferences from multiple devices. The software integrates seamlessly with Twitch, making it an excellent choice for those who want a simple setup without sacrificing quality.
XSplit
- High-quality encoding and streaming tools
- Best for professional broadcasters
- Premium version available with additional features
XSplit is a premium streaming solution known for its intuitive interface and professional-grade tools. It provides features like multi-streaming, detailed scene transitions, and advanced audio mixing. While XSplit offers a free version, its premium version unlocks additional capabilities, making it a favorite among professional streamers who need advanced broadcasting tools.
Choosing the right software depends on your experience level and streaming goals. OBS Studio is best for customization, Streamlabs is ideal for ease of use, and XSplit is a top choice for professionals looking for premium features.
Optimizing Your Twitch Stream Settings
To ensure a smooth streaming experience, you need to adjust your settings based on your internet speed and computer specifications. Here are some recommended settings:
- Resolution: 1080p at 60fps for high-quality video
- Bitrate: 6000 kbps for 1080p at 60fps, 4500 kbps for 720p at 60fps
- Keyframe interval: 2 seconds
- Encoder: NVENC for NVIDIA GPUs, x264 for CPU encoding
- Audio bitrate: 128 kbps or higher for clear sound
Resolution and Frame Rate
Choosing the right resolution and frame rate ensures a balance between visual quality and performance. 1080p at 60fps provides the best quality but requires a strong computer and internet connection. If performance issues arise, you can lower the settings to 720p at 60fps or 1080p at 30fps to reduce system load.
Bitrate and Keyframe Interval
Bitrate determines the amount of data sent to Twitch per second. Higher bitrates result in better video quality but require a stronger internet connection. The recommended bitrate for 1080p at 60fps is 6000 kbps, while 4500 kbps is ideal for 720p at 60fps. The keyframe interval should be set to 2 seconds, as this is the standard for smooth playback on Twitch.
Encoder Options
The encoder is responsible for processing your video stream. If you have an NVIDIA GPU, use the NVENC encoder to offload streaming tasks from your CPU. If you do not have a dedicated GPU, use the x264 encoder, which relies on your CPU but can still produce high-quality results with proper settings.
Audio Bitrate
For clear audio, set your audio bitrate to at least 128 kbps. If you have high-quality microphones and want better sound, you can increase it to 192 kbps or 320 kbps for superior clarity. Lower bitrates may cause your voice to sound compressed and robotic.
Properly optimizing your Twitch stream settings will improve viewer experience and reduce technical issues. Test different settings to find the best balance for your setup.
Setting Up Your Streaming Equipment
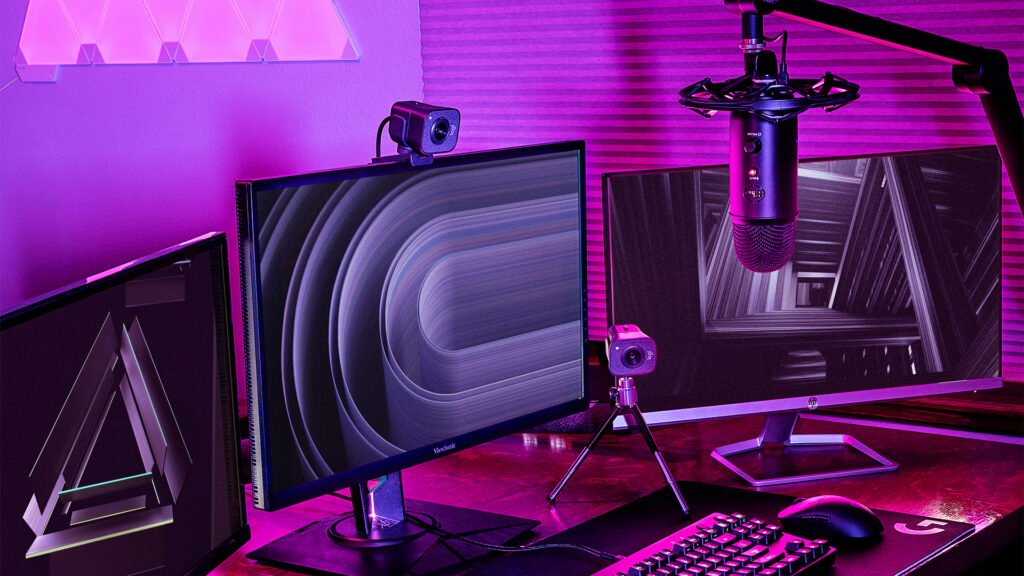
Your streaming setup impacts the quality of your broadcast. Here is what you need to focus on:
Microphone Setup
- Use a USB or XLR microphone for the best audio quality
- Adjust noise suppression and gain settings in your streaming software
- Position the microphone close to your mouth for clear sound
Your microphone is one of the most critical components of your Twitch stream. Clear, high-quality audio keeps your audience engaged and ensures your voice is heard over game sounds, music, and other background noise. Here’s how to optimize your microphone setup for the best streaming experience.
Choosing the Right Microphone
When selecting a microphone, you have two primary options: USB microphones and XLR microphones.
- USB Microphones: These are plug-and-play, making them ideal for beginners. They connect directly to your computer via USB and often come with built-in sound processing.
- Recommended models: Blue Yeti, HyperX QuadCast, Elgato Wave 3
- XLR Microphones: These offer superior sound quality but require an audio interface or mixer to function. This setup provides greater control over sound levels and quality.
- Recommended models: Shure SM7B, Audio-Technica AT2020, Rode NT1
If you’re just starting out, a USB microphone is the easiest and most budget-friendly option. However, if you want professional-grade audio, investing in an XLR setup is the way to go.
Adjusting Noise Suppression and Gain Settings
To ensure clean and crisp audio, it’s important to configure your microphone settings in your streaming software, such as OBS Studio or Streamlabs.
- Noise Suppression: This setting helps eliminate background noise, such as fans, keyboard clicks, and outside sounds.
- In OBS, go to Filters > Noise Suppression and adjust it to remove unwanted noise.
- Gain Control: This controls the volume level of your microphone. Too much gain can cause distortion, while too little can make you sound distant.
- Adjust this in your streaming software under Audio Input Settings.
- Compressor & Limiter: These settings help balance your voice so that loud moments are not overpowering and quiet moments remain audible.
Positioning Your Microphone for the Best Audio Quality
The placement of your microphone significantly impacts sound quality.
- Keep it close: Position your microphone 6-12 inches from your mouth.
- Use a pop filter: This reduces plosive sounds (harsh “P” and “B” sounds).
- Angle it slightly: Pointing the mic slightly off-axis from your mouth minimizes breath noise and popping sounds.
- Use a boom arm or stand: This helps reduce vibrations from your desk and prevents accidental knocks.
By following these microphone setup tips, you will significantly improve the audio quality of your Twitch stream, making it more professional and enjoyable for your audience.
Webcam and Lighting
- Use a 1080p webcam for high-quality visuals
- Adjust webcam settings for proper brightness and contrast
- Use soft lighting or a ring light to enhance visibility
A high-quality webcam and proper lighting setup can significantly enhance the visual appeal of your Twitch stream. Clear, well-lit visuals help establish a professional appearance and keep viewers engaged. Here is how you can optimize your webcam settings and lighting setup for the best results.
Choosing the Right Webcam
Using a 1080p webcam ensures that your video feed appears crisp and professional. While some built-in laptop cameras may suffice for casual streaming, external webcams provide better image quality, improved low-light performance, and higher frame rates.
Recommended Webcams for Streaming:
- Budget Option: Logitech C920 (Full HD 1080p at 30fps)
- Mid-Range: Razer Kiyo (1080p at 30fps with built-in ring light)
- High-End: Logitech BRIO (4K streaming support with HDR)
- DSLR or Mirrorless Camera: Canon EOS M50 / Sony Alpha a6000 (requires an Elgato Cam Link for capture)
If you plan to stream in 60fps, ensure your webcam supports a higher frame rate for smooth visuals. Some streamers also use DSLR or mirrorless cameras for professional-quality video.
Adjusting Webcam Settings
Even with a high-quality webcam, proper configuration is essential for optimal clarity. Most webcams allow you to manually adjust settings using software like Logitech G HUB, Razer Synapse, or OBS Studio.
Key Webcam Adjustments:
- Brightness & Contrast: Prevent overexposure or washed-out visuals by balancing brightness and contrast.
- White Balance: Adjust color temperature to prevent unnatural hues.
- Field of View (FOV): Set the appropriate zoom level to frame yourself properly.
- Autofocus & Exposure: Disable autofocus if it causes distractions and manually adjust exposure for consistent lighting.
Using third-party webcam software, you can fine-tune your settings beyond what is available in your streaming software.
Setting Up Proper Lighting
Lighting plays a major role in improving video quality. Without proper lighting, even the best webcam may appear grainy or dull. The goal is to create soft, even lighting that eliminates shadows and highlights your face.
Best Lighting Options for Streamers:
- Ring Light: Provides even illumination with a soft glow.
- Softbox Lights: Diffuse light for a professional studio look.
- LED Key Lights: Adjustable brightness and color temperature.
Lighting Setup Tips:
- Place the key light at an angle to reduce harsh shadows.
- Avoid direct overhead lighting, which can cause unflattering shadows.
- Use backlighting or RGB accent lights to add depth to your background.
By combining high-quality webcam settings with proper lighting, your Twitch stream will look sharp, professional, and visually engaging, helping you stand out in a competitive streaming landscape.
Internet Connection
- Use a wired Ethernet connection for stability
- Ensure at least 5 Mbps upload speed for HD streaming
- Close unnecessary background applications to free up bandwidth
A stable and fast internet connection is essential for delivering a smooth, high-quality Twitch stream. An unstable connection can result in lag, buffering, dropped frames, or even stream disconnects, which can frustrate viewers and reduce engagement. Here’s how to optimize your internet setup for the best streaming experience.
Use a Wired Ethernet Connection for Stability
While Wi-Fi may seem convenient, it is prone to interference, signal drops, and inconsistent speeds, which can negatively impact your stream. A wired Ethernet connection is the best option for streamers because it provides:
- Consistent upload speeds without sudden drops.
- Lower latency (ping) for real-time interactions.
- More reliable data transmission, reducing the risk of packet loss.
If you must use Wi-Fi, make sure you are close to your router, use a 5GHz network instead of 2.4GHz, and consider investing in a Wi-Fi 6 router or powerline adapters to improve stability.
Ensure at Least 5 Mbps Upload Speed for HD Streaming
Twitch requires minimum upload speeds based on your resolution and frame rate. The higher the video quality, the more bandwidth your stream will require.
Recommended Upload Speeds for Twitch Streaming:
- 720p at 30fps – Minimum 3 Mbps
- 720p at 60fps – Minimum 4.5 Mbps
- 1080p at 30fps – Minimum 5 Mbps
- 1080p at 60fps – Minimum 6 Mbps
- 1440p or 4K Streaming – 10+ Mbps (not commonly supported by Twitch)
To check your upload speed, visit Speedtest.net and ensure you are getting consistent speeds above the required threshold. If your internet connection is slower than expected, contact your internet service provider (ISP) to upgrade your plan.
Close Unnecessary Background Applications to Free Up Bandwidth
Running multiple applications in the background can consume valuable bandwidth and cause performance issues while streaming. To maximize your internet speed, close or disable:
- Automatic cloud sync services (Google Drive, OneDrive, Dropbox)
- Streaming apps (Netflix, YouTube, Spotify)
- Background downloads or updates (Steam, Windows Updates)
- Other devices on your network (Smart TVs, gaming consoles, mobile devices)
You can also prioritize your streaming traffic by adjusting Quality of Service (QoS) settings on your router. This ensures that your stream gets the necessary bandwidth, even when other devices are using the internet.
By using a wired connection, ensuring sufficient upload speed, and managing bandwidth usage, you can avoid dropped frames, reduce lag, and maintain a smooth, high-quality Twitch stream that keeps viewers engaged.
Customizing Your Twitch Stream
- Overlays and Alerts: Use Streamlabs or OBS to add custom graphics.
- Twitch Panels: Add channel rules, social media links, and donation buttons.
- Chat Bots: Use Nightbot or StreamElements to moderate chat and enhance interaction.
A well-designed and visually appealing Twitch stream not only enhances the viewer experience but also helps establish a strong brand identity. Customizing your stream with overlays, alerts, Twitch panels, and chat bots can make your broadcast stand out and encourage audience engagement. Here’s how to personalize your Twitch channel and live stream.
Overlays and Alerts: Use Streamlabs or OBS to Add Custom Graphics
Overlays and alerts play a significant role in making your stream visually engaging and interactive. They add personality to your channel and help maintain a professional look.
What Are Overlays?
Overlays are on-screen graphics that enhance your stream’s aesthetic. They typically include:
- Facecam borders to frame your webcam feed.
- Stream starting, BRB, and ending screens for smooth transitions.
- Game HUD overlays that display your latest follower, subscriber, or donation.
How to Add Overlays in OBS or Streamlabs OBS:
- Download or create an overlay package (free or paid).
- Open OBS Studio or Streamlabs OBS.
- Click Add Source > Image/Media Source and upload your overlay files.
- Adjust positioning and scaling to fit your layout.
What Are Alerts?
Alerts are pop-up notifications that appear on-screen when someone follows, subscribes, donates, or raids your channel. They create an interactive experience and acknowledge viewer support.
How to Add Alerts Using Streamlabs:
- Go to Streamlabs and log in with your Twitch account.
- Navigate to Alert Box in the dashboard.
- Customize alert sounds, animations, and designs.
- Copy the provided URL and add it as a Browser Source in OBS.
- Test alerts to ensure they appear correctly during your stream.
By integrating overlays and alerts, you can create a more immersive and visually appealing Twitch experience that keeps viewers engaged.
Twitch Panels: Add Channel Rules, Social Media Links, and Donation Buttons
Twitch panels allow you to customize your channel’s About section, making it easier for viewers to learn about you, follow your social media, and support your content.
How to Edit Twitch Panels:
- Go to your Twitch Channel Page and click Edit Panels.
- Click the + button to add a new panel.
- Choose a text panel or image panel.
- Add relevant details such as:
- About Me: Introduce yourself and what you stream.
- Social Media Links: Direct viewers to your Twitter, Instagram, or Discord.
- Donation and Support: Link to PayPal, Patreon, or Ko-fi for tips.
- Schedule Panel: Display your streaming days and times.
A well-organized panel section helps inform and engage your audience, making it easier for them to interact with and support your channel.
Chat Bots: Use Nightbot or StreamElements to Moderate Chat and Enhance Interaction
A lively and well-managed chat enhances viewer engagement, and chat bots help moderate discussions, provide automated responses, and add fun interactions to your stream.
Best Twitch Chat Bots:
- Nightbot: One of the most popular bots for moderation and automation.
- StreamElements Bot: Offers customizable commands, loyalty points, and giveaways.
- Moobot: Focuses on automatic spam filtering and chat engagement.
- Botisimo: Multi-platform support with advanced analytics.
How to Set Up a Chat Bot (Nightbot Example):
- Go to Nightbot.tv and log in with your Twitch account.
- Click Join Channel and follow the instructions to give Nightbot mod permissions.
- Navigate to Commands and add:
- !socials – Displays your social media links.
- !schedule – Shows your streaming schedule.
- !lurk – A fun command for viewers who want to stay but not chat.
- Adjust spam filters to block excessive caps, links, or offensive language.
Using a chat bot improves viewer interaction, reduces moderation stress, and keeps your Twitch chat engaging and friendly.
By customizing your Twitch stream with overlays, alerts, Twitch panels, and chat bots, you create a unique, professional, and interactive experience that encourages viewer engagement and builds a stronger connection with your audience.
Engaging with Your Audience
- Interact with viewers through chat
- Ask questions and respond to comments
- Play games or host discussions that encourage participation
- Use Twitch extensions to enhance audience interaction
Building a loyal community is one of the most important aspects of Twitch success. Unlike pre-recorded content, live streaming thrives on real-time interaction, making engagement a top priority for streamers who want to grow their audience. A welcoming, interactive stream keeps viewers coming back and encourages them to become dedicated followers or subscribers. Here’s how you can foster a highly engaged Twitch community.
Interact with Viewers Through Chat
Your chat is the heartbeat of your stream. Keeping it active and engaging is essential to making viewers feel included. A streamer who consistently interacts with their audience creates a more enjoyable and welcoming atmosphere.
Ways to Engage With Chat:
- Greet new viewers by name. A simple “Hey [username], welcome to the stream!” makes a big impact.
- Acknowledge messages and reactions. Even if you are playing a game, glancing at chat and responding helps build a connection.
- Use emotes and channel points. Encourage viewers to express themselves through Twitch emotes or custom channel point redemptions.
- Encourage participation. Ask viewers what they think about in-game decisions, upcoming content, or personal preferences.
If your chat becomes overwhelming, consider using a chat bot like Nightbot or StreamElements to manage spam, greet new viewers, and automate certain responses.
Ask Questions and Respond to Comments
Engagement is a two-way conversation. Asking questions or prompting discussion topics encourages viewers to participate rather than just watch passively.
Best Practices for Audience Interaction:
- Ask open-ended questions. Instead of “Did you like that fight?” try “What would you have done differently in that boss fight?”
- Encourage feedback. “What type of content would you like to see more of?” makes viewers feel like part of the creative process.
- React to viewer messages. If someone shares a funny story or a personal experience, take a moment to acknowledge and respond.
A great way to increase engagement is by creating interactive segments in your stream, such as “Q&A breaks” where you pause the game and chat with your viewers.
Play Games or Host Discussions That Encourage Participation
Not all streams are purely gameplay-focused. Some of the most engaging Twitch streams encourage audience participation in creative ways.
Engagement-Based Streaming Ideas:
- Let viewers make in-game choices. If you are playing a role-playing game, let the chat vote on dialogue options or major decisions.
- Challenge-based streams. Try “Chat Picks My Loadout” in FPS games, where viewers choose your weapons or strategies.
- Co-op or community game nights. Play multiplayer games with viewers, such as Jackbox, Among Us, or Fall Guys.
- Themed discussion nights. Some streamers dedicate one stream per week to discussing news, gaming topics, or life experiences.
Creating interactive gameplay moments makes your viewers feel like they are part of the stream rather than just spectators.
Use Twitch Extensions to Enhance Audience Interaction
Twitch extensions are a powerful tool that allows viewers to engage beyond the chat box. These add-ons can gamify your stream, encourage donations, and provide real-time interaction in creative ways.
Popular Twitch Extensions for Engagement:
- Sound Alerts: Viewers can trigger funny sound effects using bits.
- Polls and Predictions: Let viewers guess outcomes in games or vote on stream-related topics.
- Stream Avatars: Allows chatters to have a mini character that interacts on the screen.
- Channel Point Rewards: Custom incentives that allow viewers to redeem points for shoutouts, fun challenges, or on-stream actions.
Integrating extensions makes the viewer experience more immersive and interactive, which helps boost retention and engagement.
Engaging with your audience is the foundation of Twitch growth. A community that feels heard, valued, and involved is more likely to follow, subscribe, and return for future streams. By actively interacting with chat, responding to comments, creating participation-based content, and using Twitch extensions, you can transform casual viewers into loyal fans who will support and promote your channel over time.
Monetizing Your Twitch Stream

- Twitch Affiliate Program: Requires 50 followers and 500 total minutes streamed in the last 30 days.
- Twitch Partner Program: Requires higher engagement metrics and consistent streaming.
- Subscriptions: Viewers can subscribe to your channel for exclusive perks.
- Donations and Bits: Viewers can tip or cheer using Twitch’s virtual currency.
- Sponsorships: Brands may offer deals for product promotions.
Once you have built an audience, you can start earning revenue on Twitch. Other streaming platforms like Kick try to make it easier and more lucrative for new streamers. Monetization allows you to turn your passion for streaming into a sustainable income. Whether through Twitch’s built-in features like subscriptions and Bits or external opportunities like sponsorships, there are several ways to monetize your content. Below is a detailed breakdown of the main Twitch revenue streams and how you can maximize them.
Twitch Affiliate Program
The Twitch Affiliate Program is the first step toward monetization. Once you meet the eligibility criteria, you can start earning through subscriptions, Bits, and ad revenue.
Affiliate Program Requirements:
To qualify as a Twitch Affiliate, you need to:
- Have at least 50 followers
- Stream for at least 500 total minutes in the past 30 days
- Broadcast on at least 7 different days within that period
- Maintain an average of 3 concurrent viewers
Once you reach these milestones, Twitch will invite you to become an Affiliate, unlocking monetization features. Many streamers achieve Affiliate status within a few months with consistent streaming and audience engagement.
Twitch Partner Program
The Twitch Partner Program is the next level beyond Affiliate status, offering higher revenue potential, better support, and more monetization tools. However, it has stricter requirements and is geared toward full-time streamers with a strong audience.
Partner Program Requirements:
To apply for Twitch Partnership, you must meet the Path to Partner achievement:
- Stream for at least 25 hours in the past 30 days
- Stream on at least 12 different days
- Maintain an average of 75 concurrent viewers
Unlike the Affiliate Program, Partner applications are manually reviewed. Even if you meet the requirements, Twitch evaluates factors like content quality, audience engagement, and consistency before approving your application.
Benefits of Being a Twitch Partner:
- Higher revenue share on subscriptions
- Better ad revenue options
- Exclusive badges and customization features
- Priority customer support
Becoming a Partner is a long-term goal, but reaching this level can significantly increase your income and brand opportunities.
Subscriptions: Recurring Monthly Revenue
Subscriptions are one of the best ways to generate a steady income on Twitch. Viewers can subscribe to your channel to gain exclusive perks, such as:
- Ad-free viewing
- Custom emotes
- Subscriber badges
- Exclusive subscriber-only chat or streams
Subscription Tiers:
Twitch offers three subscription levels, with higher tiers contributing more revenue:
- Tier 1: $4.99 per month
- Tier 2: $9.99 per month
- Tier 3: $24.99 per month
Twitch splits subscription revenue with Affiliates and Partners, with streamers typically receiving 50% of the earnings (or 70% for some Partners).
To increase subscriptions, provide value-driven incentives, such as:
- Subscriber-only streams or Discord channels
- Special rewards for long-term subscribers
- In-game perks for community-driven games
The more value and exclusivity you provide, the more likely viewers will support your channel through subscriptions.
Donations and Bits: Direct Support from Viewers
Donations allow viewers to directly support you by tipping money or using Twitch’s virtual currency, Bits.
Bits and Cheering:
Bits are Twitch’s in-platform donation system. Viewers purchase Bits and “cheer” during your stream, sending animated chat messages while supporting you financially.
- 1 Bit = $0.01
- Twitch takes a small cut from Bits purchased
- Bits allow interactive donation features (such as sound alerts or pop-ups)
Third-Party Donations:
Many streamers also accept direct donations through platforms like:
- PayPal
- Ko-fi
- Streamlabs Donations
Unlike Bits, third-party donations typically do not have a platform fee, meaning you receive the full amount. Some streamers offer shoutouts or on-stream recognition for larger donations, creating additional incentives for viewers to contribute.
Sponsorships: Partnering with Brands
As your Twitch channel grows, brands and companies may approach you for sponsorship deals. These partnerships can be a major source of income, especially for mid-sized and large streamers. Twitch recently announced a partnership with StreamElements that makes brand deals even more accessible to Twitch streamers.
Types of Twitch Sponsorships:
- Sponsored Streams: A brand pays you to play and showcase their game or product.
- Affiliate Links: You earn a commission when viewers purchase products using your referral link.
- Product Placements: Companies send you free gear to use on stream.
- Ad Reads and Brand Endorsements: You promote a company’s services during your broadcast.
To attract sponsorship deals, focus on building an engaged audience and maintaining a professional brand. Many companies prefer smaller streamers with a dedicated, loyal following over larger creators with passive viewers.
Tips for Getting Sponsorships:
- Reach out to brands directly with a professional pitch
- Showcase engagement metrics (chat activity, concurrent viewers, social media reach)
- Only promote products relevant to your audience
Maintaining authenticity is key. If your audience trusts your recommendations, they are more likely to support sponsored products, benefiting both you and the brand.
Maximizing Your Twitch Revenue
Once you start earning on Twitch, focus on diversifying your income streams. Instead of relying solely on subscriptions or ad revenue, combine multiple methods to maximize earnings and financial stability.
Best Monetization Strategies for Twitch Streamers:
- Promote Subscriptions: Regularly remind viewers of the perks they get by subscribing.
- Set Up Donation Alerts: Encourage Bits and PayPal donations with on-screen alerts.
- Join Affiliate Programs: Use Amazon Associates or other platforms to earn commissions.
- Offer Exclusive Content: Create Patreon rewards, behind-the-scenes videos, or special Q&A sessions.
- Diversify Beyond Twitch: Upload highlights to YouTube, TikTok, and Instagram to expand your brand.
The more income sources you build, the more sustainable your Twitch career will be.
Monetizing your Twitch stream takes time, but with consistent effort, engagement, and content strategy, you can turn your channel into a profitable brand. Whether through subscriptions, donations, sponsorships, or ad revenue, the key to success is building a loyal audience that values your content. By diversifying revenue streams and providing value-driven incentives, you can maximize your Twitch earnings while creating a thriving community around your content.
Troubleshooting Common Streaming Issues
- Laggy Stream: Lower bitrate settings or upgrade your internet connection.
- Audio Sync Issues: Adjust the audio delay settings in OBS.
- Dropped Frames: Check CPU usage and reduce encoding load.
- Mic Echo: Use noise suppression and disable audio monitoring.
Even experienced streamers face technical issues that can disrupt their broadcasts. From lagging streams to audio sync problems, troubleshooting these issues quickly is essential to maintaining a smooth and professional live stream. Below are some of the most common Twitch streaming issues and how to fix them.
Laggy Stream
A laggy stream makes it difficult for viewers to enjoy your content. If your stream keeps buffering, stuttering, or dropping quality, it is likely due to high bitrate settings, slow internet speeds, or hardware limitations.
How to Fix a Laggy Stream:
- Lower your bitrate: If your upload speed is low, reduce your bitrate settings in OBS or Streamlabs.
- Upgrade your internet connection: Ensure you have at least 5 Mbps upload speed for 720p streaming and 10 Mbps+ for 1080p.
- Use a wired Ethernet connection: Wi-Fi is unstable and can cause packet loss.
- Close background applications: Disable unnecessary downloads, uploads, and streaming services.
- Enable hardware encoding: Switch to NVENC (for NVIDIA GPUs) or AMD Encoder to reduce CPU usage.
If your stream is still lagging after these adjustments, check Twitch’s recommended bitrate settings based on your internet speed.
Audio Sync Issues
If your microphone audio is delayed or out of sync with your video, it can be distracting for viewers. This issue is usually caused by latency differences between your microphone, webcam, and gameplay feed.
How to Fix Audio Sync Issues:
- Adjust the audio delay in OBS: Go to Settings > Advanced Audio Properties, then tweak the “Sync Offset” setting for your microphone.
- Use a capture card’s built-in delay settings: If using an Elgato capture card, adjust audio delay settings in the Elgato Game Capture Software.
- Ensure all devices have the same sample rate: Set both your mic and desktop audio to 48kHz or 44.1kHz in your system settings.
- Test different USB ports: Plugging your mic into a different USB port can sometimes resolve desynchronization issues.
To ensure perfect sync, record a short test video before going live and fine-tune the delay settings accordingly.
Dropped Frames
Dropped frames mean that your stream is not sending data to Twitch fast enough, causing it to appear choppy or unstable. This is typically caused by internet connection issues, high CPU usage, or incorrect encoding settings.
How to Fix Dropped Frames:
- Lower your stream bitrate: If you are dropping frames, try reducing your bitrate by 500-1000 kbps.
- Check CPU usage: If your CPU is overloaded, lower your encoder settings or switch to GPU encoding (NVENC or AMD Encoder).
- Use a wired connection: Dropped frames are often caused by Wi-Fi instability. Always use Ethernet for streaming.
- Optimize your OBS settings:
- Change Encoder Preset to “Performance” instead of “Quality”.
- Lower Output Resolution (from 1080p to 720p if necessary).
- Reduce FPS from 60 to 30 to ease the encoding load.
- Monitor Twitch Server Performance: Sometimes, Twitch ingest servers can be overloaded. Try switching to a different Twitch server in your streaming software settings.
If dropped frames persist, use OBS’s “Stats” panel to diagnose whether the problem is network-related or CPU-related.
Mic Echo and Background Noise
An echoing microphone or excessive background noise can make your stream sound unprofessional and difficult to listen to. This issue usually occurs due to incorrect audio monitoring settings, poor microphone placement, or room acoustics.
How to Fix Mic Echo and Noise Issues:
- Disable audio monitoring: In OBS, go to Advanced Audio Properties and set “Monitor Off” for your microphone.
- Use a noise suppression filter: Apply OBS’s built-in Noise Suppression filter to reduce background sounds.
- Adjust mic placement: Keep your microphone close to your mouth but away from speakers to prevent feedback.
- Use a pop filter and boom arm: A pop filter reduces plosive sounds, while a boom arm isolates the mic from desk vibrations.
- Enable Push-to-Talk: If using Discord or in-game chat, enable Push-to-Talk to prevent unwanted noise transmission.
For a professional-sounding stream, consider using RTX Voice (for NVIDIA users) or Krisp (for AI-based noise cancellation).
Stream Disconnects or Crashes Mid-Broadcast
If your Twitch stream randomly disconnects or crashes, it could be due to unstable internet, overheating hardware, or Twitch server issues.
How to Fix Frequent Stream Disconnects:
- Check your internet connection: Run a speed test and ensure you have a stable upload speed.
- Enable “Reconnect” in OBS: Go to Settings > Advanced > Auto-Reconnect, so OBS automatically tries to restart the stream if it disconnects.
- Monitor PC temperature: Use HWMonitor or MSI Afterburner to check if your CPU or GPU is overheating.
- Change your Twitch ingest server: Use TwitchTest (a free tool) to find the best-performing Twitch server in your region.
- Reduce streaming resolution and FPS: Lowering from 1080p to 720p or switching from 60 FPS to 30 FPS can reduce strain on your network and hardware.
If Twitch servers are experiencing outages, check Twitch’s Status Page for updates and try again later.
Technical issues are a normal part of live streaming, but knowing how to troubleshoot them efficiently ensures a smooth and enjoyable experience for your viewers. By optimizing your stream settings, internet connection, and hardware configuration, you can prevent most common issues and maintain a high-quality Twitch stream.
Before every broadcast, do a test stream to catch potential issues before going live. Keeping your streaming software updated, monitoring CPU/GPU usage, and maintaining a strong internet connection will help you avoid interruptions and keep your audience engaged.
Growing Your Twitch Channel
- Stick to a Consistent Schedule: Stream at the same time each week.
- Promote on Social Media: Share highlights on Twitter, TikTok, and Instagram.
- Collaborate with Other Streamers: Join multiplayer streams or co-host content.
- Optimize Your Stream Titles and Tags: Use relevant keywords to increase discoverability.
Building a successful Twitch channel requires more than just hitting the “Go Live” button. With thousands of streamers broadcasting at any given moment, standing out and attracting viewers takes consistent effort and strategic marketing. Here are some of the best ways to grow your Twitch channel and increase your viewership over time.
Stick to a Consistent Schedule
Consistency is key to growing a loyal audience. When viewers know when to expect your streams, they are more likely to return and become regulars in your community.
How to Set a Streaming Schedule:
- Choose fixed days and times that fit your lifestyle.
- Stream during peak hours (afternoon/evening in your target time zone) to attract more viewers.
- List your schedule on your Twitch profile and promote it on social media.
- Use Twitch’s Schedule Feature so followers get reminders about upcoming streams.
If you need to miss a stream, communicate with your audience in advance through Discord or Twitter to maintain engagement.
Promote on Social Media
Leveraging social media platforms is one of the most effective ways to increase Twitch discoverability. Twitch does not have an algorithm that recommends small streamers, so cross-promoting your content is essential.
Best Platforms for Twitch Promotion:
- Twitter/X: Share stream updates, highlights, and engage with the gaming community.
- TikTok: Post short clips of funny, exciting, or skillful moments to attract new viewers.
- Instagram & Instagram Stories: Share behind-the-scenes content, announcements, and polls.
- YouTube: Upload full stream replays or create edited highlights and tutorials to reach a larger audience.
- Discord: Build a community server where followers can chat, get stream notifications, and participate in events.
Social Media Growth Tips:
- Use hashtags (e.g., #TwitchStreamer, #GamingCommunity) to reach more users.
- Engage with other creators and fans by replying to tweets and leaving comments.
- Post daily or weekly highlights to showcase the best moments from your stream.
- Encourage your viewers to share your content: Word-of-mouth is powerful!
- Join the Video Game Streamers Facebook group and share fun clips from your streams!
Consistency in social media engagement will drive more traffic to your Twitch channel over time.
Collaborate with Other Streamers
Networking and collaborating with other Twitch streamers can expose your content to new audiences. Viewers from another channel are more likely to follow you if they enjoy your personality and content.
Ways to Collaborate on Twitch:
- Co-Stream Multiplayer Games: Play with other streamers and interact with their viewers.
- Host or Raid Fellow Streamers: Support others by sending your audience to their streams.
- Guest Appearances on Podcasts or Panels: Participate in Twitch discussions or gaming talk shows.
- Join Twitch Teams or Communities: Many streamers work together under the same branding or category.
- Create Themed Events or Challenges: Organize fun competitions or themed streams with multiple creators.
How to Find Streamers to Collaborate With:
- Engage in Twitter and Discord streamer communities.
- Watch and support similar-sized streamers before reaching out.
- Join networking groups or Twitch teams to connect with potential partners.
- Send a polite, professional collaboration request to streamers with shared interests.
Collaborating helps both streamers grow together, benefiting everyone involved.
Optimize Your Stream Titles and Tags
Twitch’s search and recommendation system relies on titles, tags, and categories to surface relevant streams. If your titles and tags are optimized, new viewers can discover your channel more easily.
How to Write Clickable Stream Titles:
- Use keywords related to your content (e.g., “Road to Radiant – Valorant Ranked Grind!”).
- Keep it short and engaging (Avoid generic titles like “Come Chill” or “Live Now”).
- Add excitement or a hook (e.g., “Can We Get a 10-Win Streak? | Apex Legends Live”).
- Use numbers or challenges (e.g., “Playing Every Horror Game – Day 3 of 7”).
Choosing the Best Twitch Tags:
Tags help Twitch categorize your stream, making it easier for viewers to find. Use game-specific, skill level, and community tags, such as:
- For Competitive Gamers: “Ranked”, “High-Level Play”, “Clutch Moments”
- For Variety Streamers: “Casual Play”, “First Playthrough”, “Indie Games”
- For Interactive Streams: “Viewer Games”, “Chatting”, “Q&A”
- For Language-Specific Audiences: “English”, “Spanish”, “French”
By using relevant and trending tags, you increase the chances of appearing in Twitch’s search results and recommended sections.
Engage with Your Viewers
The more interactive and engaging your stream is, the more likely viewers will stick around and return. A highly engaged chat makes your stream feel more alive and welcoming.
Ways to Improve Viewer Interaction:
- Acknowledge every new viewer and say hello.
- Ask questions to encourage chat participation.
- Run polls and interactive elements using Twitch Extensions.
- Create inside jokes and memes with your community.
- Host live Q&A sessions or just-chatting segments.
Engagement builds loyalty, which translates into returning viewers and more subscribers.
Growing your Twitch channel takes time, effort, and consistency, but following these strategies will help attract new viewers and keep them engaged.
By sticking to a schedule, promoting your content on social media, collaborating with other streamers, optimizing your stream settings, and interacting with your audience, you can build a thriving Twitch community.
The key is to stay patient, continuously improve your content, and have fun—because when you enjoy what you do, your audience will too.
Start Streaming on Twitch
Streaming on Twitch is an exciting and rewarding journey that allows you to connect with an audience, share your passion, and even earn revenue. Whether you are gaming, hosting discussions, or showcasing your creativity, setting up a high-quality stream is essential to success.
By ensuring you have the right streaming equipment, optimizing your stream settings, engaging with your viewers, and marketing your channel effectively, you can grow a loyal community and stand out in the competitive world of Twitch streaming.
Success on Twitch does not happen overnight, but with consistency, interaction, and high-quality content, you can build a thriving channel. Stick to a schedule, experiment with different engagement strategies, and continuously refine your setup and content.
Now that you have the knowledge to get started, it is time to go live. Set up your stream, hit that “Start Streaming” button, and begin your journey as a Twitch creator. Happy streaming!